A Container Photography Studio for Small Subjects
The fantasy version of a container photo studio has a sweeping white cyclorama, a model striding toward the camera and a ceiling lost somewhere above the lights. Forget it. A shipping container is about 2.35 metres wide inside before anyone lines it, and no amount of white paint changes that. What a container can do very well is something smaller and more common: a dedicated room for product shots, catalogue work and head-and-shoulders portraits, where the lights stay set up and the paper stays on its roll.
That’s the brief for this concept. Imagine a photographer who earns most of her income shooting products for small online sellers, ceramics, jewellery, skincare, and books the occasional headshot for local professionals. She is tired of building a studio on the dining table every Monday and dismantling it every Friday. She wants a space where a set-up can stay put overnight, where the editing desk isn’t in the same pool of light as the flash, and where she can make the room completely dark when she needs to.
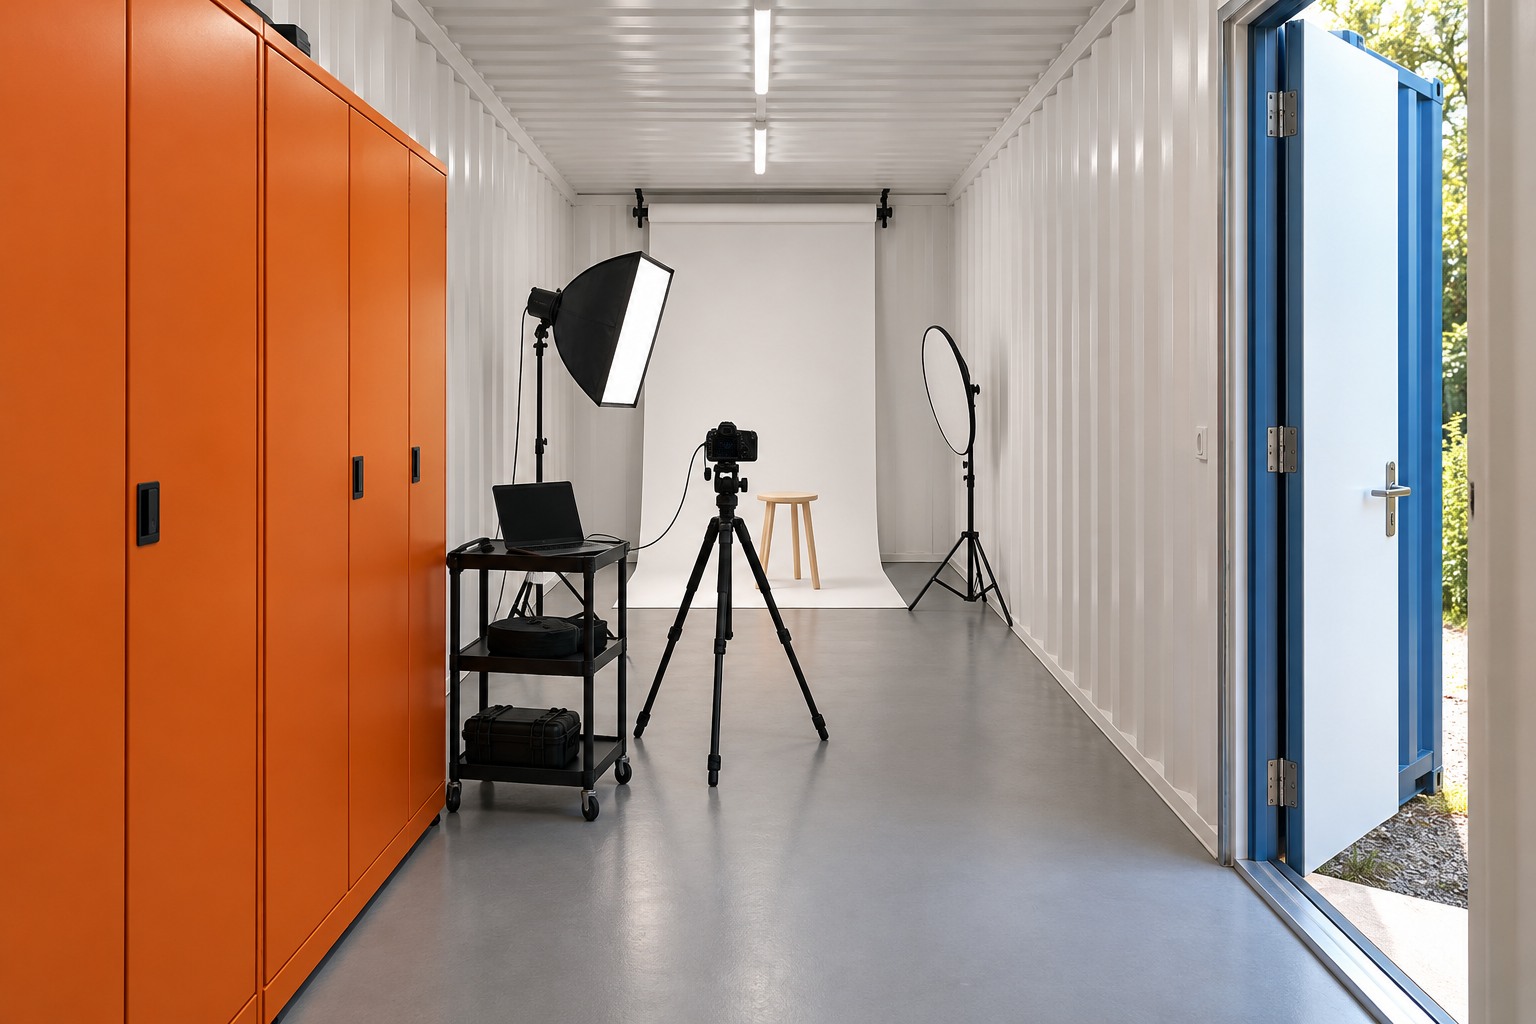
Image credit: pxef.com. AI-generated design concept.
The shell is a 40-foot high-cube, the tall version of the long container. One shipping line publishes inside dimensions of about 12.03 metres by 2.35 metres by 2.70 metres, with a caveat that units vary by manufacturer, and its own older brochure lists the width at 2,342 millimetres. For layout purposes this proposal allows 75 millimetres of insulation and lining on each long wall and the closed end, 150 at the cargo-door end where a new inner screen goes in, and 60 and 75 for floor and ceiling. That leaves a finished room of roughly 11.8 metres by 2.2 metres with 2.56 metres of headroom. The length is generous. The width and height are what a photographer actually works with, and they have to be taken seriously from the first sketch.
Start with the backdrop, because everything else hangs off it. Seamless paper comes in a few standard widths, and the common ones are 1.35, 2.18 and 2.72 metres. The 2.72 metre roll is the studio favourite. It also won’t fit across this room, since the finished width is 2.2 metres, and it is too tall to store standing up under a 2.56 metre ceiling. A nominal 2.18 metre roll would leave only ten millimetres at each side before allowing for the core, mounting hardware or manufacturing variation. That is not a workable specification for a 2.2 metre room. The 1.35 metre roll, about 53 inches, is the right size. Mounted on suitable brackets across the closed end, it leaves roughly 425 millimetres of wall to either side of the paper before accounting for its supports. Those strips are not separate working aisles. A roll of that length also fits upright in the proposed storage rack.
Is 1.35 metres of paper enough? For selected products and tightly framed headshots, it can be, and a first-order calculation helps explain the limit. For an illustrative 36 by 24 millimetre full-frame sensor and a 105 millimetre lens, a portrait-orientation frame about 600 millimetres tall suggests a camera-to-subject distance of roughly 1.75 metres in a simplified field-of-view calculation. Seat the subject about 1.7 metres in front of the paper and the background visible behind them is only about 1.2 metres tall and 0.8 metres wide. Turn the camera horizontal and the background coverage is still about 1.2 metres wide, inside the roll with a little spare. These are planning estimates, not guaranteed working distances: actual focus, lens behavior, framing and the subject all matter. A wider crop can expose the paper edges. Small tabletop products offer more flexibility, while full-length portraits and groups fall outside this concept’s brief.
Working backward from the paper sets out the shooting zone. The backdrop face sits about 11.7 metres from the front of the room. The posing stool goes at roughly 10 metres. The camera, on a tripod, sits at about 8.25 metres, and the photographer stands just behind it. The 1.7 metres between subject and paper matters for more than coverage. Light falls off with distance, so a key light a metre from the subject lights the paper much less than it lights the face, and separating the subject from the paper gives more control over background shadows. The actual shadows still depend on the light position and modifier; separation alone does not guarantee a clean background. Photography guides make the same complaint about small rooms. You never quite get enough distance. This layout spends the container’s length on exactly that problem.
Stands are the next constraint, and they are wider than people expect. The layout reserves roughly a metre for the leg spread of a compact stand, but the actual stand, modifier and ballast need checking together. In a 2.2 metre room, a modest softbox can sit front-left of the subject, with a compact reflector on the right. That arrangement has to be tested with the equipment in place; a drawing of the stand pole misses the legs, cables and the space needed to adjust it. There is no generous margin for a large octabox or a boom. This proposal keeps its lights on compact floor stands rather than treating the container roof as a ready-made mounting system. The bright white surfaces may also send unwanted fill back toward the subject. Black flags can help control that spill when contrast matters. The illustration shows the room during setup, with the side door open, rather than a light-controlled exposure in progress.
The front of the container works differently. The first three metres, behind the original cargo doors, become an editing room. The steel doors stay on their hinges, with a glazed screen set inside the frame and a blackout blind behind the glass. The desk runs along a long wall so the monitor faces neither the window nor the backdrop end. A sliding opaque partition separates this room from the rest. With a properly fitted opaque partition closed, direct spill from shooting lights can be controlled, and the editing light can be set low and steady while a set-up sits untouched beyond the panel. For editing, the aim is stable, controlled ambient light, neutral nearby surfaces and no direct light or reflection across the display. Display calibration and brightness need to suit the viewing task; print evaluation and screen editing are not identical conditions. The blackout blind is the everyday light control. The side entrance remains the occupied studio’s exit, with a usable route through the partition, and the external cargo doors are closed and locked only after everyone has left.
Between editing and shooting comes a 2.2 metre storage and arrival zone, which is the part that keeps the whole thing usable. The entrance is a normal side door in the right-hand long wall, so clients walk in at the middle of the plan, away from both the screen and the set. A long run of orange steel cabinets on the left and a shorter run beyond the side door on the right, each assumed 500 millimetres deep, hold stands folded upright, softboxes in their bags, tethering cables, props and the paper rolls standing vertically in a rack. Where the cabinets face each other, that leaves a nominal 1.2 metre route with their doors closed. Opening a cabinet temporarily occupies part of that space, so equipment is retrieved before clients move through; it is not a separate full-width aisle while doors and drawers are open. Everything has a home within a few steps of the set, and loose cases need not live between the tripod legs. Paper rolls belong in a clean, dry, restrained rack, away from damp floors and direct sunlight.
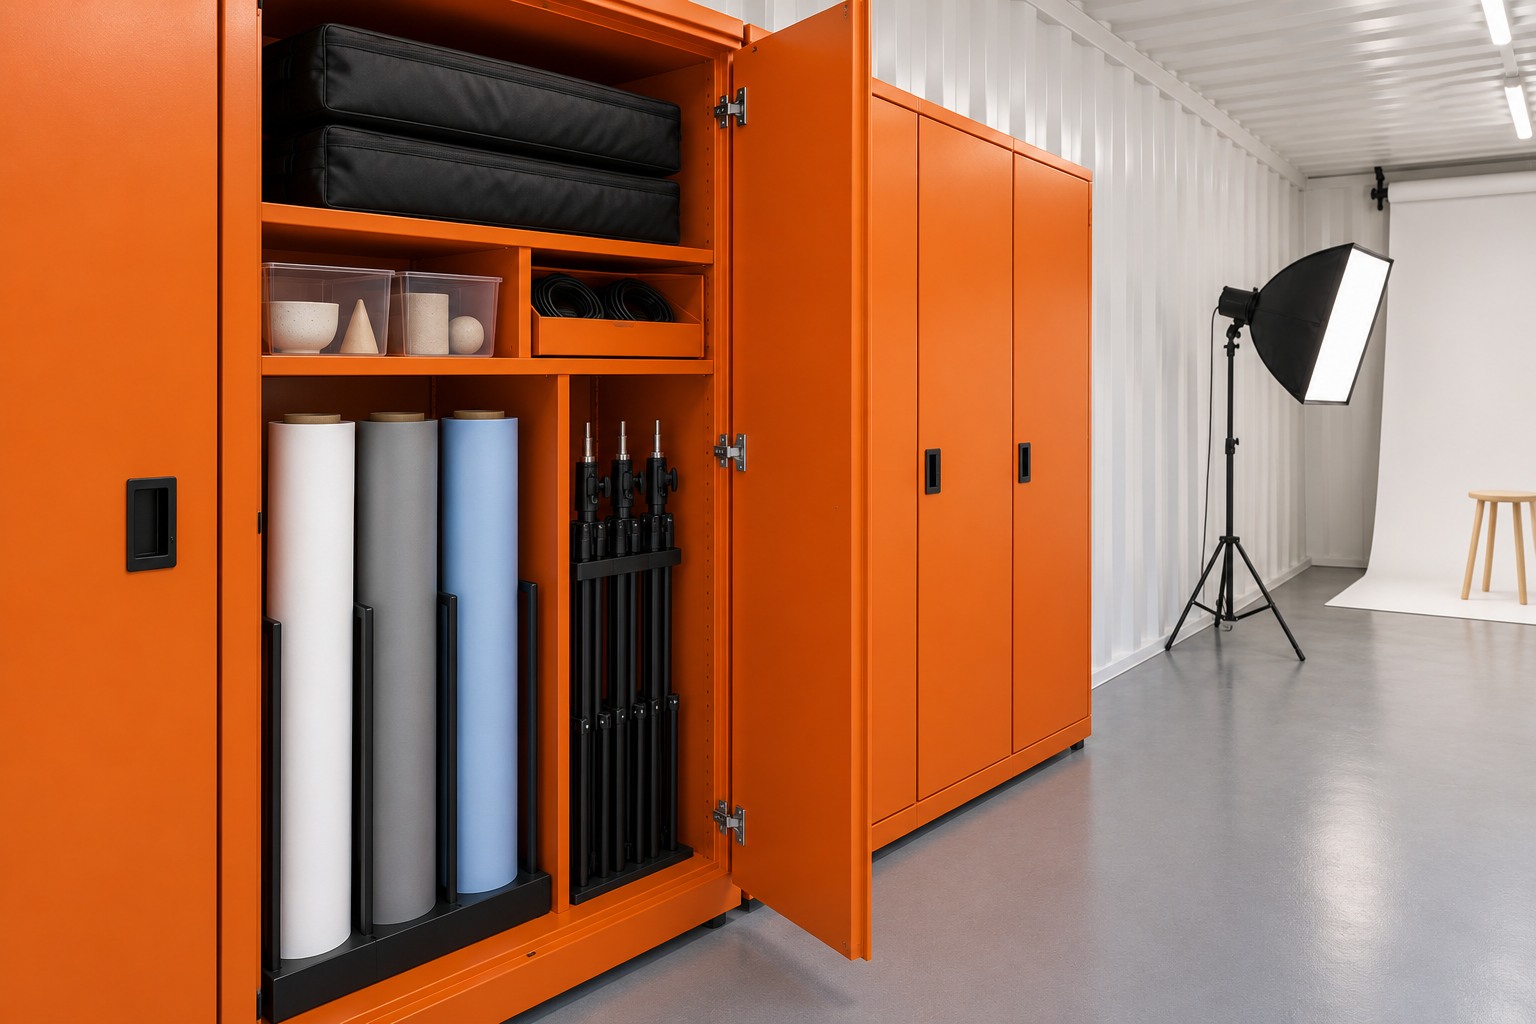
Image credit: pxef.com. AI-generated design concept.
Daylight deserves an honest paragraph. Window light is free and beautiful, and plenty of product photographers swear by it. It also changes colour through the day and with cloud, which camera makers acknowledge every time they put separate white balance presets for daylight, cloud and shade on a menu. In a container, daylight also comes from one direction only unless someone pays to cut more steel. This proposal gives the shooting zone no windows and uses artificial light, with the side entrance closed during exposures. Keeping its settings and ambient conditions consistent makes repeatable results easier; white balance alone cannot correct every mismatch between light sources. That suits catalogue work, where fifty products need to match. A photographer who mainly does natural-light work should choose differently, and a side window cut into the shooting zone would be the first change to discuss with a structural designer.
A sealed, light-tight box with continuous lights running all day will also get warm. Ventilation that moves air without letting light in, a cooling plan, and an electrician’s view on how many lights and chargers will run at once are servicing questions to settle before the lining goes up, with any new opening and support designed for the actual conversion. The 75-millimetre lining allowances here are bookkeeping assumptions for space planning, not a recommended insulation assembly for every climate.
The alternative worth weighing is renting time in a shared studio or converting a garage. A garage is often wider than 2.2 metres, which buys freedom for lights and bigger paper. A shared studio gives a real cyclorama for the jobs that need one. The container makes sense for a photographer whose work is small, repetitive and frequent, who wants the set ready every morning, and who values a long, narrow room built around one axis. For that person, the width stops feeling like a limitation and becomes a constraint the layout has deliberately accommodated. It still is not a wide studio, and knowing which jobs to send elsewhere is part of making it useful.